Night Photography Tips for Oslo Winter Lights 2026
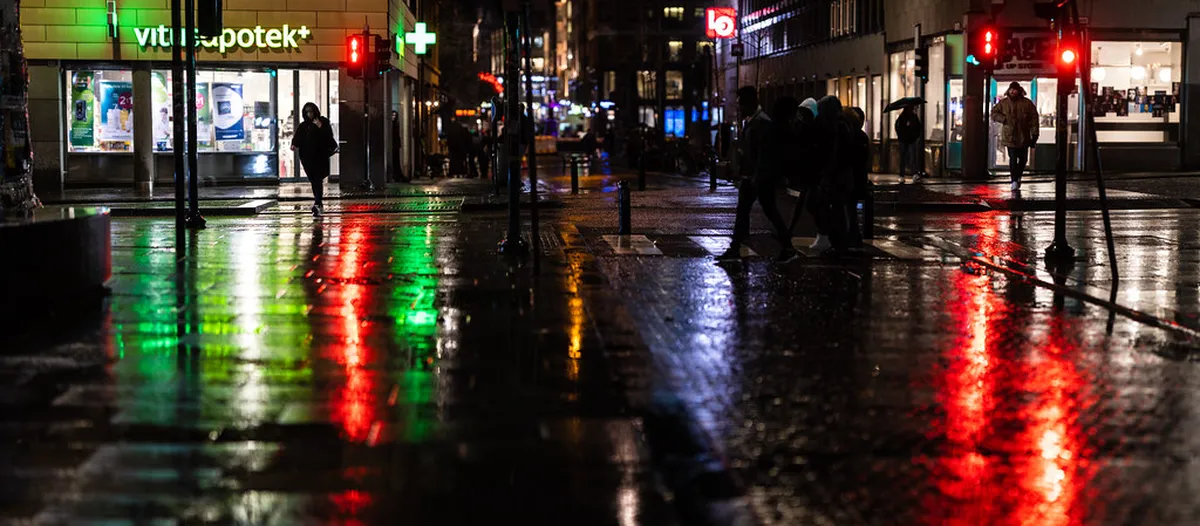
Table of Contents
Expert Night Photography Tips for Oslo Winter Lights in 2026
Oslo in winter 2026 transforms into a glowing wonderland that every photographer should visit once. The city offers a unique blend of modern architecture and warm festive lights against dark nights. Using these night photography tips for Oslo winter lights ensures your images look crisp and professional. You will find that the crisp arctic air creates incredible clarity for your evening cityscapes. Capturing the glow of the Norwegian capital requires patience and specific technical skills for the best results.
Preparing for the freezing temperatures is just as important as knowing your camera settings for low light. Many visitors struggle with battery life and lens fogging when shooting in the cold Norwegian climate. This guide provides actionable advice to help you master the art of long exposures in the city. You should research the best Oslo winter photography spots 2026 before heading out into the cold night air.
Essential Gear for Oslo Winter Night Photography
A sturdy tripod is your most vital tool for capturing sharp night shots in the city. Night photography requires long exposures that any handheld camera will blur during the cold winter months. Choose a carbon fiber tripod to avoid frozen hands during the setup process in the snow. It stays warmer than aluminum when temperatures drop below freezing in the center of Oslo.
Cold weather drains camera batteries much faster than warm summer days during your 2026 photography trip. Always carry at least two spare batteries inside your warm inner coat pockets for every shoot. Keeping them near your body heat ensures they stay charged for longer sessions in the outdoors. This is a vital part of your Oslo winter travel guide 2026 preparation for the harsh weather.
Remote shutters or using your camera timer will prevent camera shake when you press the shutter button. Even the smallest movement can ruin a thirty-second exposure of the beautiful city lights at night. Use a wide-angle lens with a fast aperture for the most dramatic architectural shots of the city. A lens hood is also useful to protect your front element from falling snow or sleet.
Bringing a microfiber cloth is essential for wiping away any moisture that forms on your camera lens. Transitioning from cold outdoor air to a warm indoor cafe will cause immediate fogging on your gear. Place your camera in a sealed plastic bag before entering buildings to allow for slow temperature changes. This simple trick protects your expensive electronics from internal condensation during your winter photography sessions.
Mastering Camera Settings for Sharp City Lights
Manual mode is necessary to control the balance between the dark shadows and bright street lamps. Set your ISO to the lowest possible value to minimize digital noise in the dark sky. A range between ISO 100 and 400 usually works best for long exposures on a tripod. This setting preserves the rich blacks of the winter night while capturing every glowing light detail.
Aperture choice affects both the depth of field and the look of the city light sources. Use a narrow aperture like f/8 or f/11 to create a beautiful starburst effect on streetlights. This technique adds a professional sparkle to your images of the harbor and the modern barcode district. It also ensures that the entire cityscape from foreground to background remains in sharp focus throughout.
Shutter speed depends on the available light and the specific creative effect you want to achieve tonight. Start with an exposure of five to ten seconds and adjust based on your camera's live histogram. Longer exposures will smooth out the dark waters of the Oslo Fjord for a clean, minimalist look. You can capture light trails from the blue trams by using a twenty-second exposure in the center.
Set your white balance to a manual Kelvin setting to avoid the orange glow of old streetlights. A setting between 3000K and 4000K often produces the most natural-looking colors for winter night scenes. Shooting in RAW format is essential for recovering details in the dark shadows during the post-processing stage. This flexibility allows you to fine-tune the blue hour tones that define the Norwegian winter atmosphere.
Top Locations for Night Lights in Oslo 2026
The Oslo Opera House is a premier location for capturing modern architecture reflected in the cold sea. Its white marble surfaces glow beautifully under the soft evening lights of the surrounding Bjørvika neighborhood area. Walk up the roof to find unique angles of the city skyline and the illuminated harbor below. The contrast between the dark water and the bright building makes for a stunning visual composition.
Aker Brygge offers a vibrant atmosphere with plenty of warm light from the many seaside restaurants and shops. The wooden boardwalks and reflections in the water provide endless opportunities for creative night photography in 2026. Look for the contrast between the historic Akershus Fortress and the modern buildings across the dark harbor water. This area is perfect for practicing your Oslo Christmas market lights techniques during the festive season.
Karl Johans gate is the main street where you can capture the energy of the city at night. The grand buildings and the Royal Palace are lit up with elegant spotlights that highlight their history. Use the tracks of the passing trams to create dynamic light trails leading toward the historic central station. The holiday decorations along this street provide a magical foreground for your wide-angle city photography shots.
Head to the Ekebergparken sculpture park for a panoramic view of the entire city glowing in the dark. The elevated position allows you to capture the lights of the harbor and the city center together. This spot is particularly beautiful during the blue hour when the sky still has some deep color left. It is one of the most quiet and peaceful places to shoot during the winter nights.
Dealing with Low Light and Blue Hour
🎯 Insider Tip: Discover the best Oslo experiences with Viator Tours!
Blue hour occurs just after sunset and provides a perfect balance between artificial and natural light sources. In Oslo, this period lasts longer during the winter than it does in more southern European cities. The sky turns a deep, saturated blue that complements the warm yellow glow of the city lamps. Aim to arrive at your chosen location at least thirty minutes before the sun actually sets.
Take advantage of the early sunsets in December and January to shoot during the late afternoon hours. You can capture stunning night shots and still be back inside for a warm dinner by six. The low angle of the sun during the day also creates long, dramatic shadows for your photography. This timing is ideal for travelers who want to avoid the coldest temperatures of the late night.
Snow acts as a massive natural reflector that brightens up the dark streets of the Norwegian capital. Even a thin layer of frost can help bounce light into the shadows of your night compositions. Pure white snow can sometimes trick your camera's light meter into underexposing the rest of the scene. Always check your screen to ensure the snow looks white rather than a dull, muddy gray color.
Focusing in the dark can be a challenge for even the most advanced autofocus systems on cameras. Use manual focus and the zoom function on your screen to ensure the buildings are perfectly sharp. Pick a bright point of light in the distance to set your focus accurately for the shot. This method prevents the camera from hunting for focus in the dark areas of the winter landscape.
Post-Processing Your Oslo Winter Night Photos
💡 Pro Tip: Book your Oslo adventures in advance through Viator for the best deals!
Editing your images is the final step in creating a professional look for your winter photography collection. Start by adjusting the exposure and shadows to reveal the hidden details in the dark city streets. Be careful not to push the shadows too far or you will introduce digital noise into the image. A subtle touch often works better than extreme adjustments when working with night-time files from your camera.
Color grading is where you can truly emphasize the cold, wintery feel of the Norwegian capital at night. Cool down the shadows by adding a hint of blue or teal to the dark areas of the photo. Keep the highlights warm to represent the inviting glow of the cafes and festive holiday light displays. This color contrast creates a professional look that captures the true essence of an Oslo winter.
Noise reduction software is very helpful for cleaning up any graininess in the dark parts of the sky. Modern programs can remove noise while preserving the sharp details of the architectural lines and the streetlights. Apply sharpening selectively to the buildings and avoid sharpening the sky to prevent unwanted digital artifacts from appearing. This ensures your final image looks clean and high-quality for printing or sharing on social media.
Straighten your horizon lines to ensure the modern buildings of the barcode district do not appear to tilt. Perspective correction tools can help fix any distortion caused by using a wide-angle lens for your cityscapes. Crop your images to remove distracting elements at the edges of the frame for a cleaner composition. These small final adjustments make a significant difference in the professional quality of your winter night photography.
Frequently Asked Questions
🌟 Local Expert Tip: Get the most out of your Oslo visit with guided tours!
What is the best time for night photography in Oslo?
The blue hour is the most popular time for night photography in the Norwegian capital city. It typically occurs between 3:30 PM and 4:30 PM during the peak of the winter season. This time provides a stunning deep blue sky that balances perfectly with the warm city lights. You should plan your shoot early as the sun sets very fast in the north.
How do I protect my camera from the Oslo winter cold?
Keep your spare batteries in a warm pocket close to your body to maintain their charge. Use a weather-sealed camera bag to protect your gear from snow and moisture during your travels. When moving back indoors, place your camera in a plastic bag to prevent condensation from forming. This allows the equipment to warm up slowly to the room temperature without any damage.
Are tripods allowed in public spaces in Oslo?
Yes, you can generally use tripods in most public outdoor areas around the city of Oslo. Most parks and sidewalks are open for photographers as long as you do not block pedestrian traffic. Some private areas like shopping malls or specific museums may require special permission for tripod use. Always be respectful of other people walking on the snowy sidewalks while you are shooting.
Capturing the winter lights of Oslo in 2026 is a rewarding experience for every dedicated photographer. By following these night photography tips for Oslo winter lights, you will create professional images of Norway. Remember to pack warm layers and plenty of spare batteries for your long evening sessions. The combination of modern design and traditional festive glow makes the city a unique subject for your portfolio. Use this advice to make the most of your trip to the beautiful Norwegian capital this winter.
Key Takeaways
- Use a sturdy tripod for long exposures to ensure sharp images.
- Shoot during the blue hour for the best balance of light.
- Keep spare batteries in warm pockets to avoid power loss.
- Use manual focus to ensure sharpness in dark city environments.
- Protect your gear from condensation when moving indoors from the cold.
Related reads: polarcityguide.com, best sunset photography locations in winter oslo, photographing the northern lights in oslo norway.